1. Create a new project
After creating an account, you should see a prompt on the dashboard to create a new site from a Git repository. Click on the Import from Git button.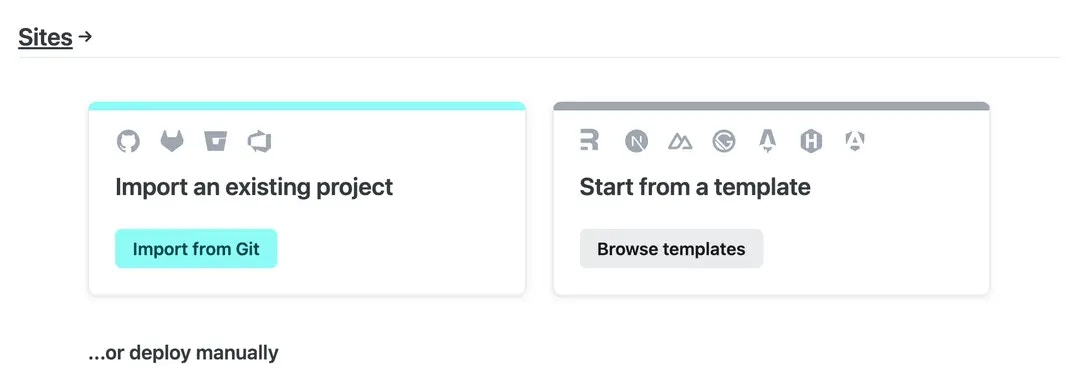
2.Select your repository
If not already done, you will be asked to connect your Git provider account. After that, you can select the repository you want to deploy.3. Configure the build
After selecting the repository, you will be promted to configure the build settings. Usually Netlify will detect the correct settings automatically. If not, you can configure them manually like in the screenshot below: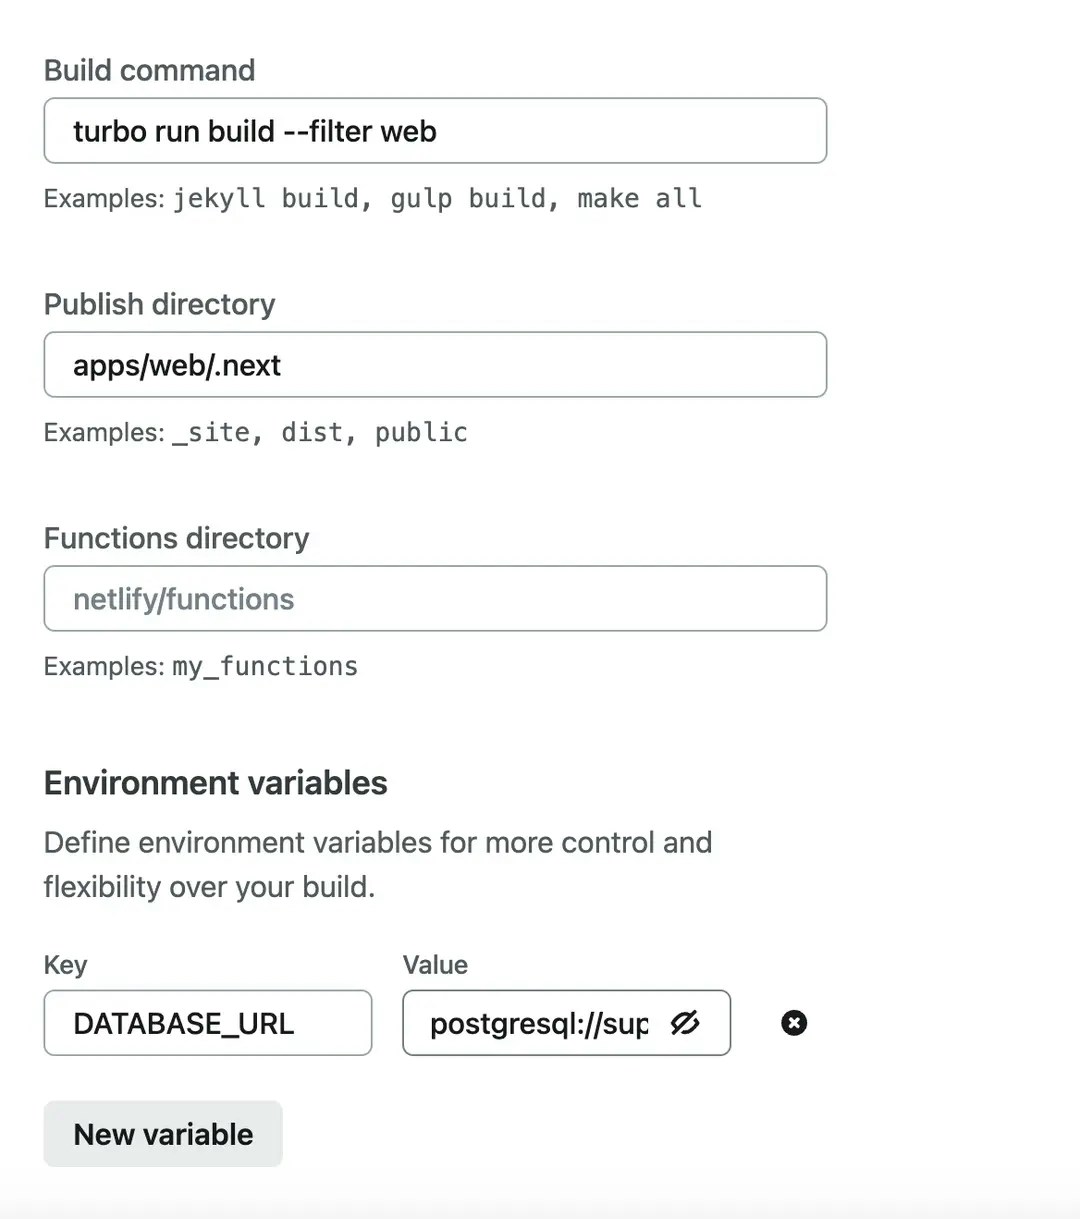
4. Deploy the site
Now click on the Deploy site button and wait for the deployment to finish. After that, you should be able to visit your freshly deployed SaaS.After your site has been deployed, go to 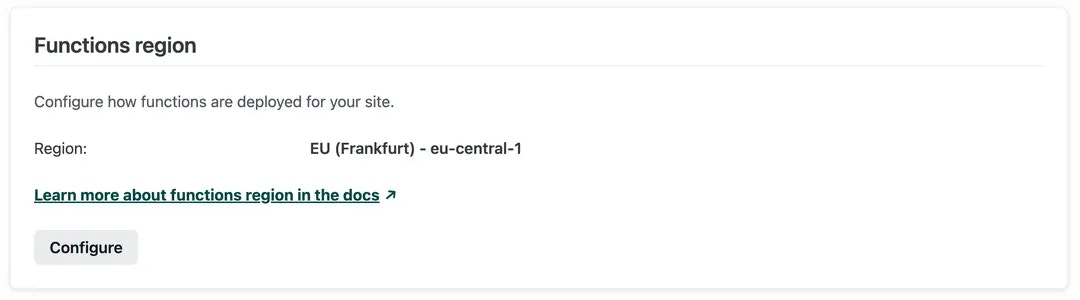
Site configuration -> Build & deploy -> Functions region and select the region closest region to where your database is hosted. This will reduce the loading time of your api functions and improve the overall performance of your SaaS.Make sure to redeploy your site after changing the region by clicking the Trigger deploy button on the Deploys page of your project.